NOTE: This information has been adapted from Faculty Affair’s extensive documentation at https://faculty.umd.edu/media/143/view. Content has been edited and adjusted to suit ESSIC faculty.
Table of Contents
Faculty Success Overview
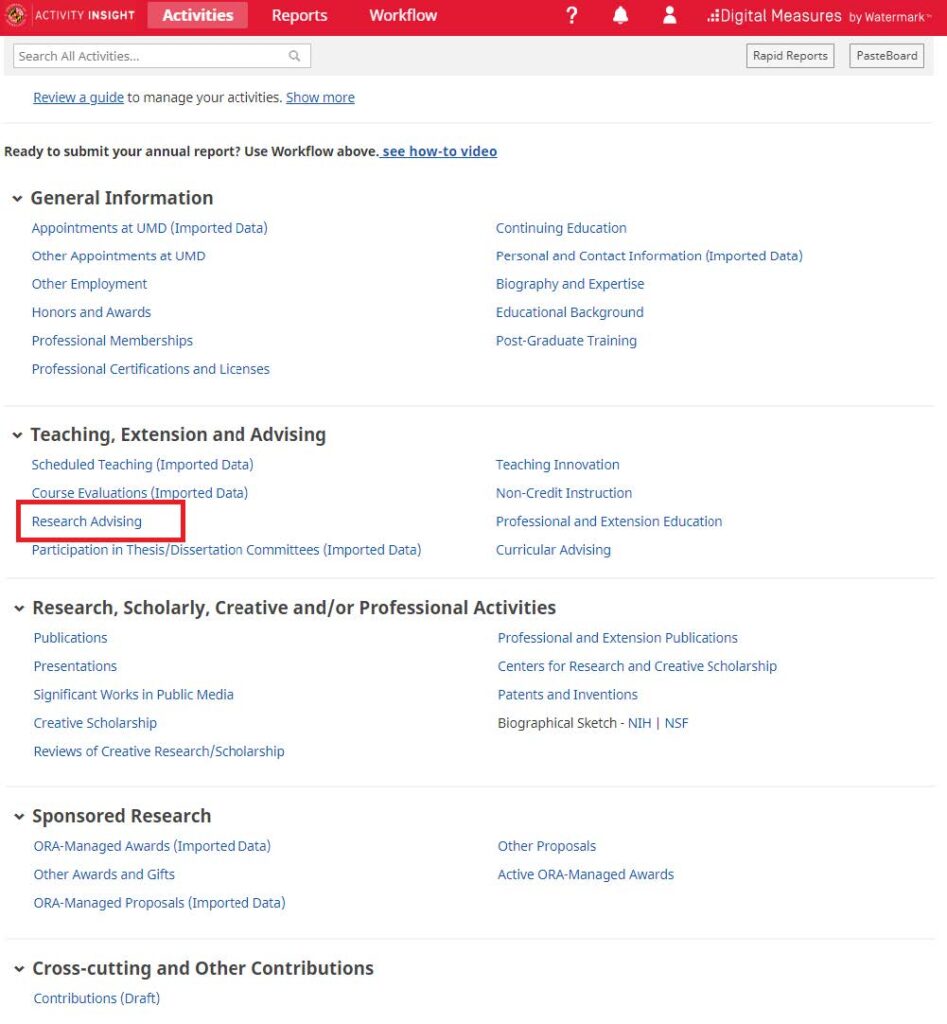
The Activities screen will be your home screen. From this screen you can choose any of the blue links to enter or edit activities.

The ? icon in the top navigation bar opens a popup that sends email directly to the Faculty Success team at UMD.
The “Search All Activities…” input area is a quick way to locate activities on any screen based on free-text search terms.
The guide available for review on the Activities screen is provided by Faculty Success. Use the Show more link to access this UMD Faculty User Guide.
Important Notes to Keep in Mind
- Please keep your name consistent as you enter it throughout the Faculty Success website. Always use your full first and last name. Avoid initials, nicknames, and misspellings. Discrepancies may cause your work to not be counted correctly.
- If you are the first author or presenter, it is vitally important that you enter your name as it appears in the UMD system. Nicknames, abbreviations, or variations in spellings and/or punctuation may cause your contribution to be misrepresented.
- Please write the full titles of organizations, associations, and journals rather than the abbreviations.
- Take special care when noting your data (i.e. publications) to correctly mark the item’s status. For example, publications can be published, in-press, submitted, or in review.
- Note that we will ask you to enter your task information as well, though Faculty Success does not have a built-in field for that. Click here to see where to put your task information.
- It is integral that you submit your report once it’s complete. If you do not submit the report properly, it will not be counted. Click here for instructions on how to submit your report.
Faculty Success is meant to be suitable for everyone on campus, so there are many categories that may not be relevant to your work at ESSIC. However, some data that is relevant to your ESSIC activity is buried in somewhat unintuitive locations.
- For a guide on where specific data should go, click here: https://essic.umd.edu/faculty-success/where-does-____-go/
- If you are looking to record Software Packages, Algorithms, or Datasets, these are to be organized under the Creative Works and Scholarship umbrella. Under “Creative Works and Scholarships” click the dropdown under “Type of Work” to indicate datasets, software, websites, instruments, etc.
- Technical Reports can be listed under any “Publications” screen. Click “Contribution Type” and scroll through the dropdown to indicate “Technical Reports”. Please provide link(s) if possible.
Data Brought In From Other Sources
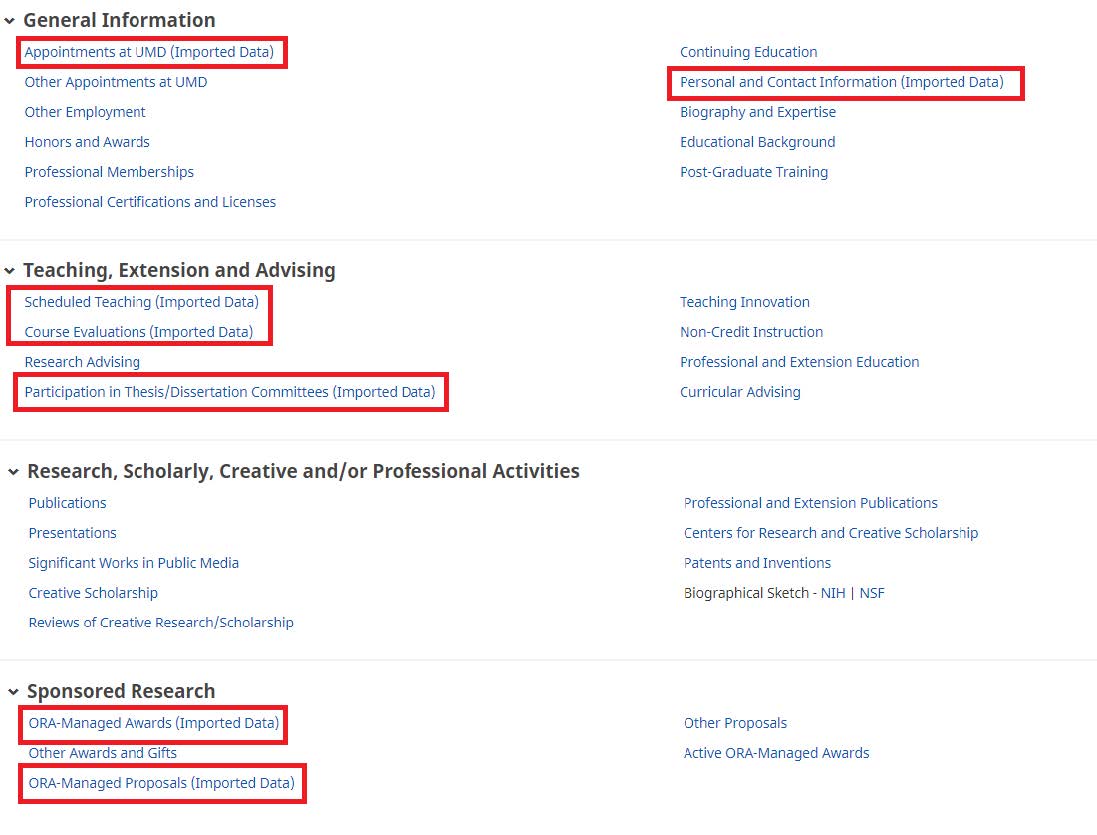
Faculty Success automatically brings in activity data from other sources, in particular other campus data management systems. The below highlighted sections bring in such data so it does not have to be manually entered. These can be easily identified with the ‘Imported Data’ keyword.
Note that data populated from a number of campus integrations cannot be edited on the data screen. Click here (page 5) to see where the data is drawn from, how often the update occurs, how far back the data goes, and how to get changes made, if needed.
Activity Screens: The Basics
After clicking on an activity screen, you will see a summary screen showing your preloaded or manually entered activities. The screenshot below shows the summary screen for the Honors and Awards activity screen.
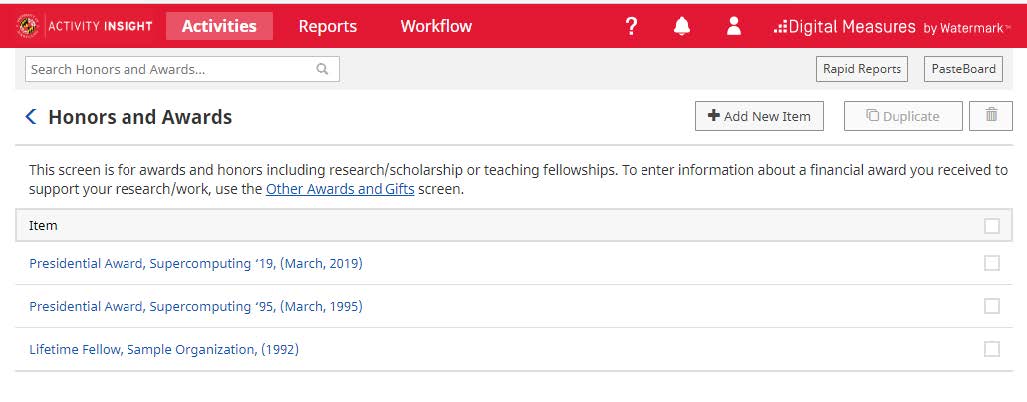
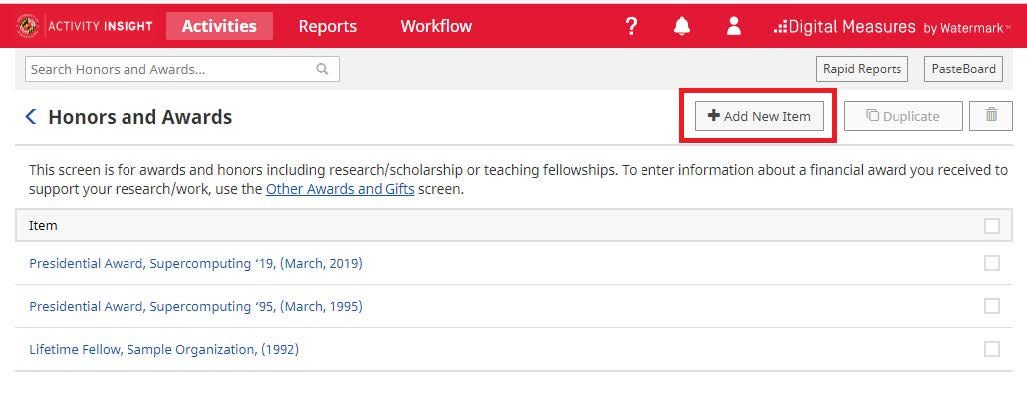
You can click an existing record to edit it, or you can click the Add New Item to create a new record. Either option will bring you to the Data Entry screen.
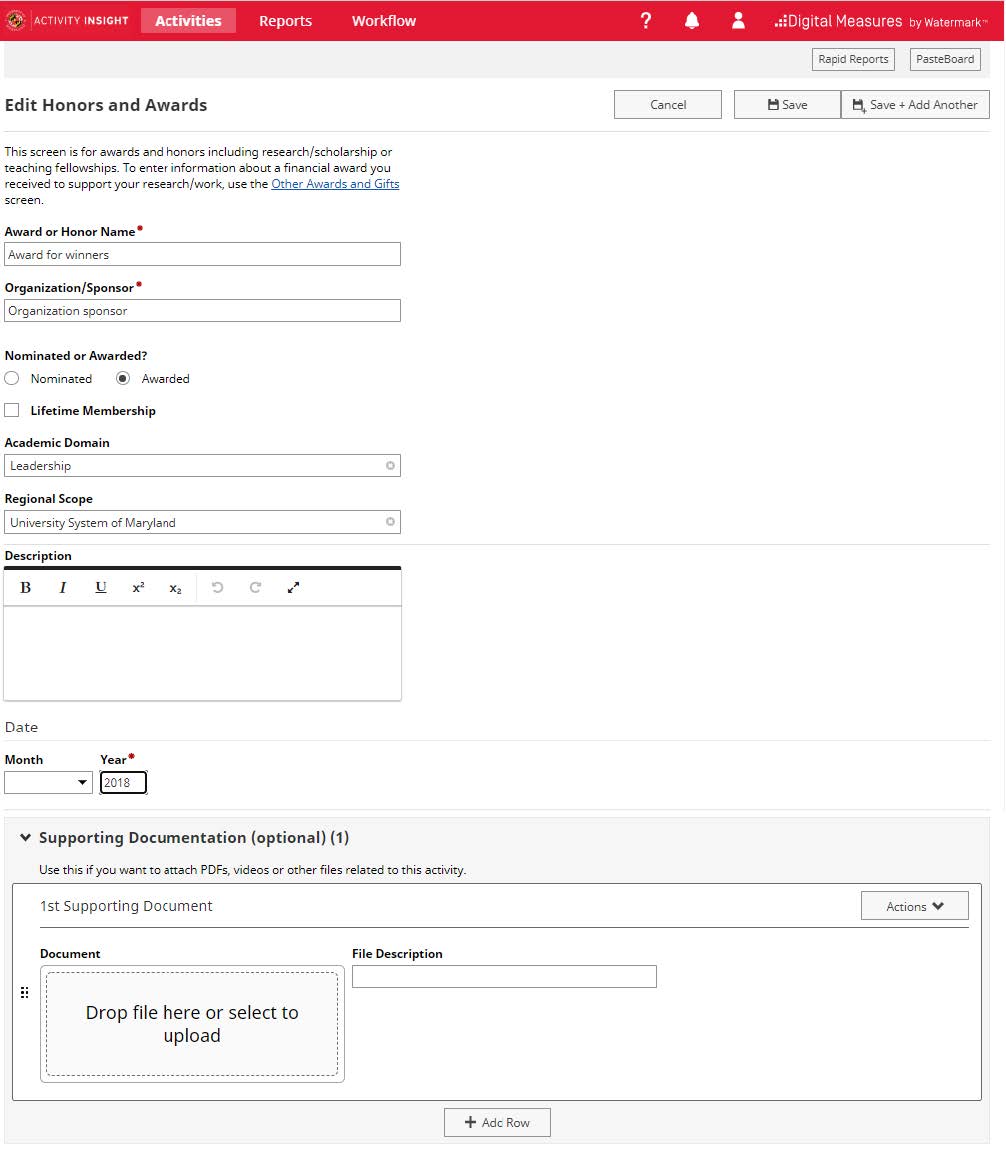
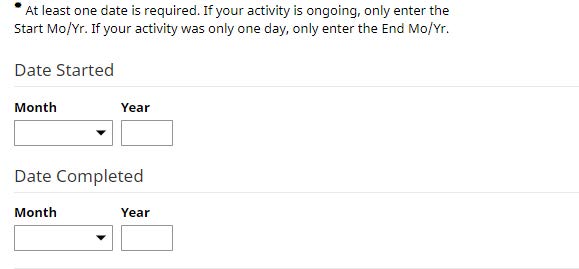
Here you should fill in all of the required fields (denoted by red asterisks) and as many of the optional fields as you would like. The dates are very important for activities and thus are required even not highlighted. Please ensure that you have at least filled out a month or a year of one of the date fields.
Then save your entry with the Save button at the top of the screen.
If your activity is not saved, please check the activity page for any error messages like “At least one date is required.” or “This field is required”.
Adding An Item
Items represent any activity, entry, service, or record that is added to one of the various sections within Faculty Success. Activity screens in Faculty Success have been customized for UMD based on the UMD Vita template and the annual activity report. Choose any link on the main Activities screen to go to the summary screen for that activity. From there, you can add new activity items.
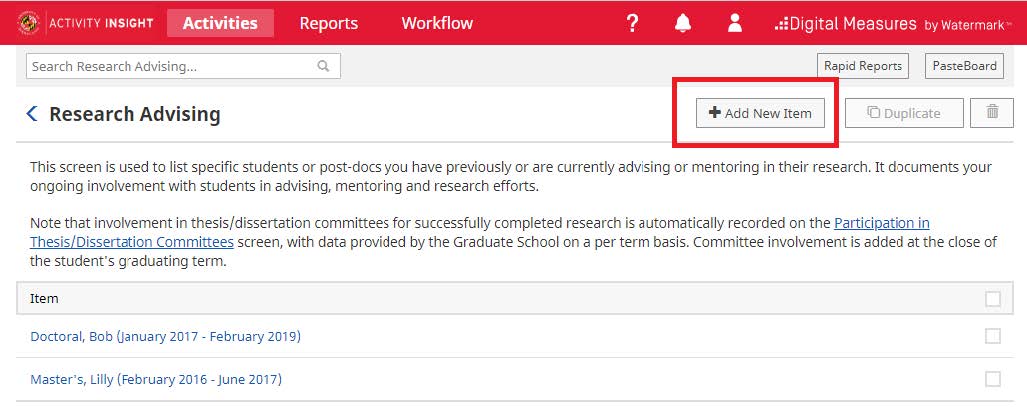
When you click a link you will first see a summary screen. Here you can see all of the activities that have already been loaded or that you have entered.
To add an activity click “Add New Item” in the upper right.
This is the data entry screen. Notice that required fields have a red asterisk.
The dates are very important for activities and thus are required even not
highlighted. Please ensure that you have at least filled out a month or a year
of one of the date fields.
Note: You want to fill in your information based on how you want it to look on
reports, so be sure to use proper capitalization and punctuation in all fields.
Also keep in mind, these screens are designed to be used by faculty from all
disciplines across campus, so some screens may have fields that don’t pertain
to you. You can either leave those fields blank, or if the field is required, fill it
in with the most logical option for your department.
Date Handling in Faculty Success
For reporting to work properly, and for activities to be properly organized on reports, entries must have dates. Most screens will have two spaces for each date, one for month and one for year. The day is very rarely asked for. The date format in Faculty Success is [Month Name] YYYY or [Month Name] DD, YYYY, if the day is included.
For activities that are ongoing, only enter the start date, and leave the end date blank. If the activity was only one day, or a period of time within the same month, enter the end date and leave the start date blank.
Some fields have additional help available through the ? help icon. In other cases, on-screen instructions provide guidance on how to enter data for the associated field(s).

After filling in all required information, you may choose to add Supporting Documentation. This is completely optional. This is a way to store PDFs, videos or other files related to this activity. To add supporting documentation, you can either drop the files or choose an
option to upload under Supporting Documentation.
Once you have added all of your information and documents you can click “Save” at the top of the page. This will take you back to the summary view of all of your entries for this activity screen.
Important Note: Remember to Save. Click on the Save button after completing all the fields. If your activity is not getting saved, please check the activity page for any error messages like “At least one date is required.” or “This field is required”. These messages appear just below the field with the associated error

Entering Your Task Information
Faculty Success does not have an intuitive place to enter your task information. Instead, please follow the instructions to enter it using the Interactive Annual Activity Report Tool. For instructions on how to use the interactive activity tool to enter it, click here.
Scroll to the seventh section down on the Faculty Success homepage, Cross-cutting and Other Contributions. Click the link “Contributions” under it.

On the activity screen, click “Add New” to open up a new item.

A screen will pop up asking for information.
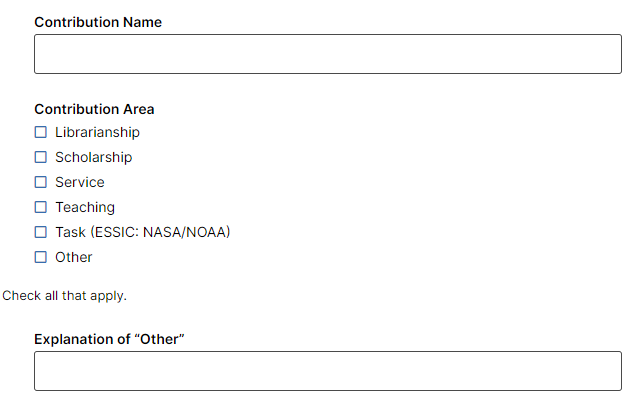
For Contribution Name, type the name and number (if applicable) of your task.
For “Contribution Area”, check “Task (ESSIC: NASA/NOAA)”.
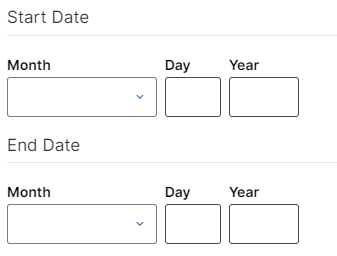
Make sure to remember to mark the start and end date of your task. If the task is ongoing, leave the end date blank.
Make sure to “Save” before closing the item. Please add all your tasks in this format.
Editing Entries in Faculty Success
If you need to make changes to any of your pre-loaded activities, or any activities you have entered, you can locate the record you want to edit and click on the link to view it.
Make any necessary updates to the data entry screen. Remember that all required fields(marked with an asterisk) must be filled in. Once finished click “Save” in the upper right.


Removing an Item
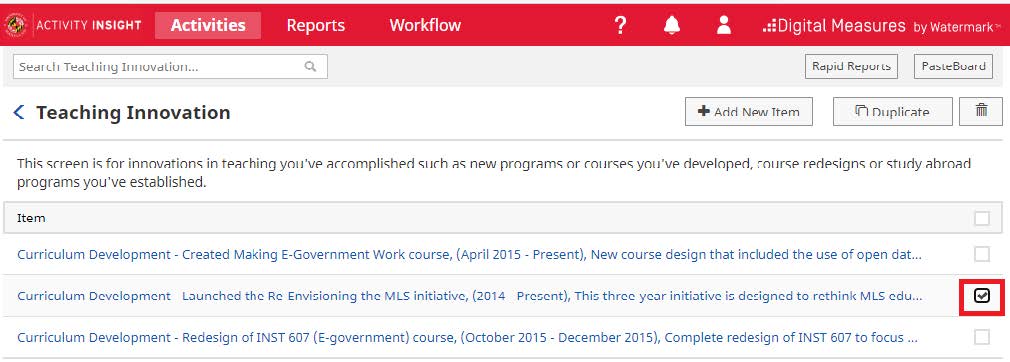
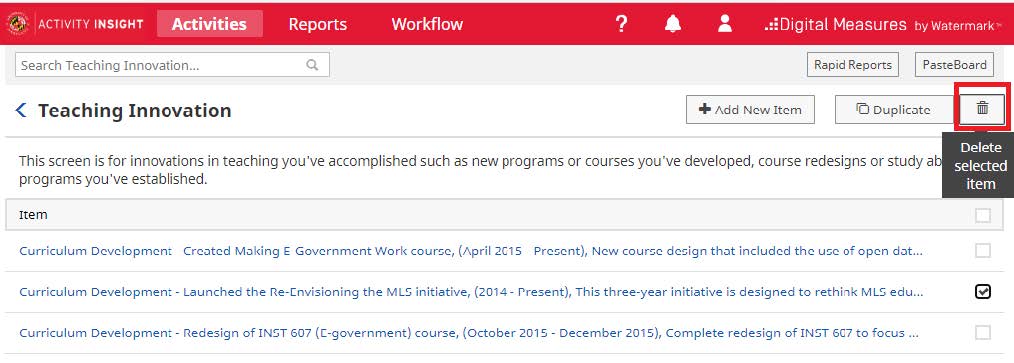
You will get a popup box asking if you are sure you want to delete the record.

Select Delete. Now you will see that your record has been removed from the summary screen.
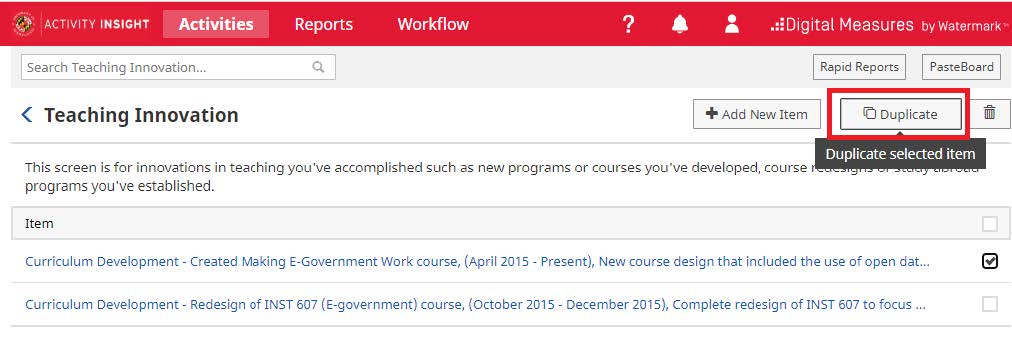
Duplicating an Item
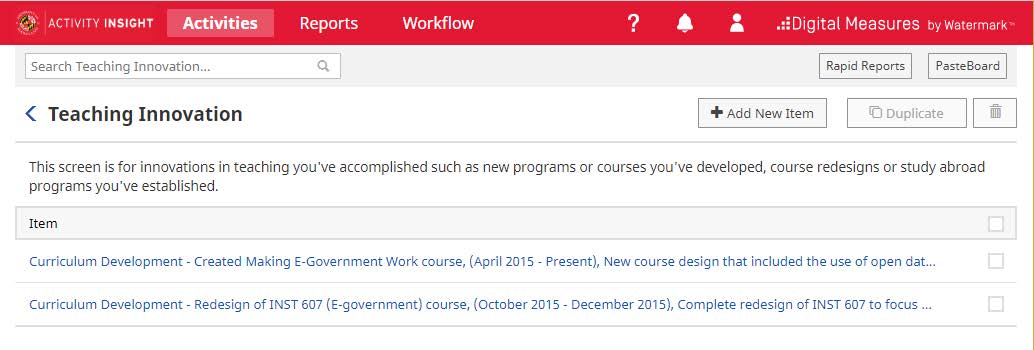
Then click Duplicate in the upper right
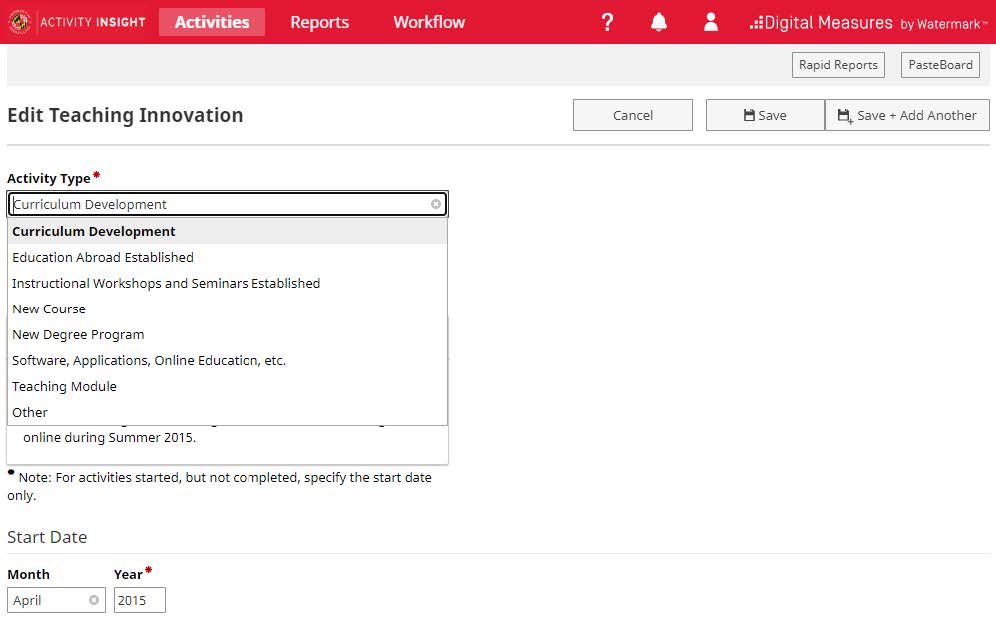
Now you can update information for your new record.
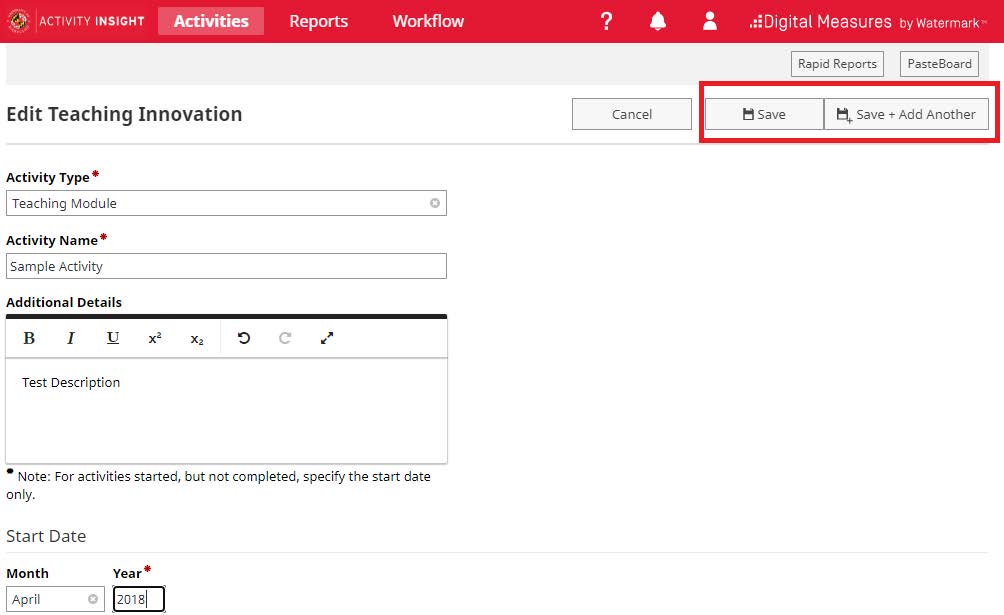
Once you have updated all desired fields, click the Save button in the upper right.
Submitting Your Report
You must submit your report in order for your work to be counted. This is a manual action that does not occur automatically after you finish entering your submissions.
To submit your report, use the main menu and navigate to “Workflow”.

You will see a page that documents your task and history. Find “Annual and Merit Review 2022” on this page.

Use Actions->Submit to Approver, when you are ready to submit your annual report and optional personal statement.
If after submitting you need to make a change, recall the submission, revise, refresh the report and submit it again.
